how to configure Gen AI service in Oracle APEX using Open AI
In this Blog post I will explian how we can configure Gen AI service of Oracle APEX using Open AI LLM model.
Introduction: We can bring Gen AI capabilities based on large language model (LLms) to our applications built using Oracle APEX. The Gen AI service can be accessed through REST APIs, and by using the powerful REST Data Source capabilities of APEX, we can incorporate the advanced technology into our applcations with a low-code approach.
Pre-Requisites:
- Should have Open AI account and Open AI key.
- Access to Apex 24.1 workspace.
STEP 1: Create Web Credentials in Oracle APEX
-
Log into APEX wokspace and from APEX home page, click App Builder.
-
Now Click on Workspace Utilities.
-
Now click on Web Credentials.
-
Click Create.
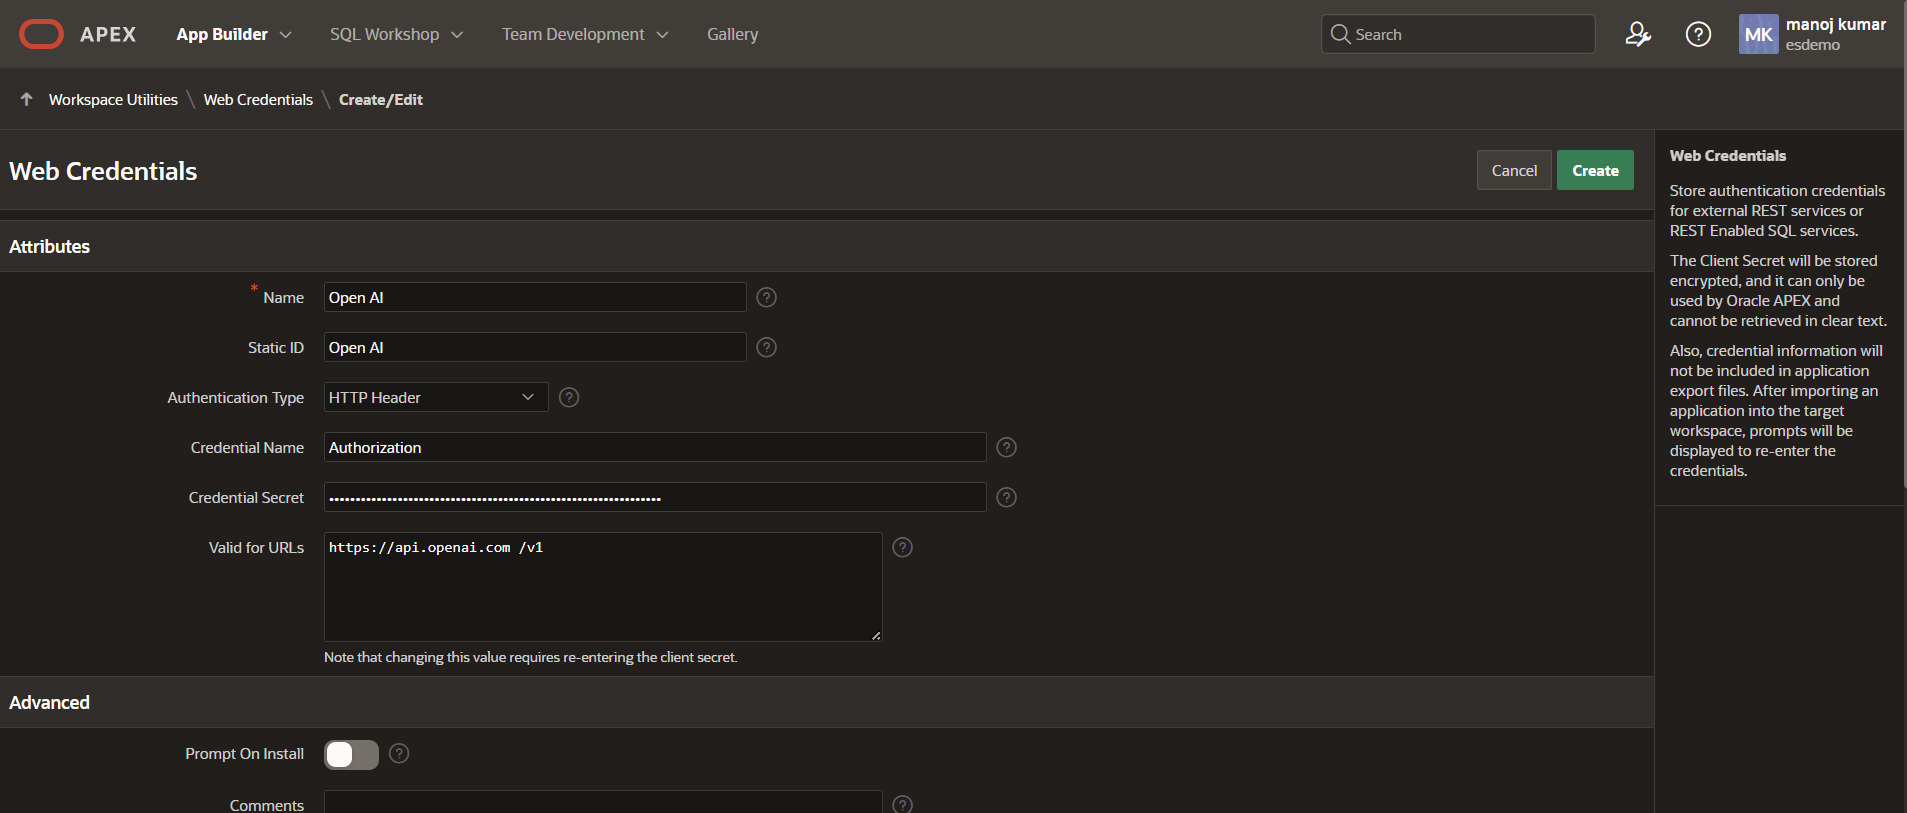
- Fill the below attributes and click Create.
Name = Open AI Static ID = Open AI Authentication Type = HTTP Header Credentials Name = Authorization Credential Secret = Bearer <Your Open AI API Key> (note that there is space between Bearer and api key) Valid for URL = https://api.openai.com /v1 - It will create the Web Credentails.
STEP 2: Now we have Web Credential we are ready to configure Gen AI service in APEX.
-
Again go to Application builder and click on Work space Utilities and this time click on Gen AI Services.
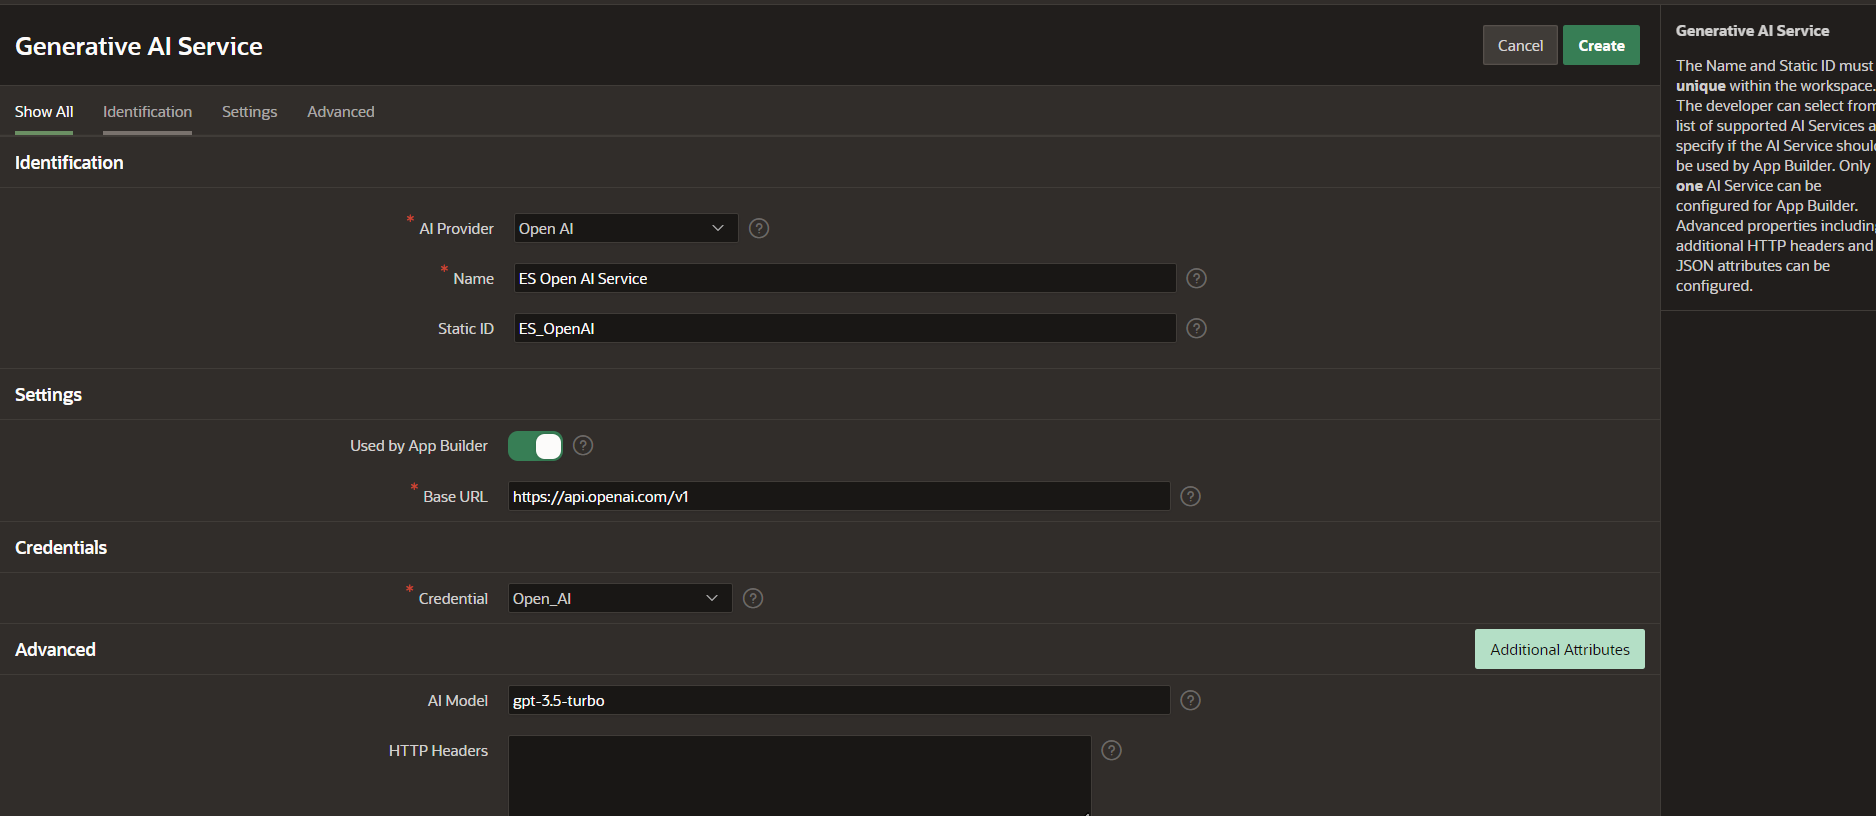
- Click Create and provide the information.
AI Provider = Open AI ( as I am using Open AI, if you using other provider, select accordingly)
Name = ES Open AI Service (The name will be shown in the Generative AI Services overview page.)
Static ID = ES_OpenAI  (The static ID is used when using the service with the APEX_AI package (APEX_AI.CHAT).)
Enable used by App builder
Make sure in the credential ssection web credenatils are selected that we created in Step 1.
- It will show like below.
STEP 3: Now We click on SQL Workshop –> SQL Commands and see that we have the APEX Wizard button enabled now.
Click on APEX Assistant and accept , it will open APEX Wizard.
So we successfully configure Gen AI service with Apex.
In next blog I will show you how to use this Apex assiatant.


